We finished all of our filming at the weekend which went well and so this week we have been able to concentrate on editing our film together and choosing what shots to use for our 5 minute film. We have enough footage for 5 minutes and have been editing the sequence together to determine what shots to use and if we need any more so we have more time to be prepared in case we do.

 However, whilst editing, we realised that our long continuous tracking shot was too long for our film so we had to cut it down. In doing this, we lost the end of the shot so which we really liked as we had the tracking shot change from a mid shot to an extreme long shot which looked impressive. However, we had to sacrifice it in order for the length of the shot not be too long and boring which would result in the mood and tone of our film possibly being taken away.
 We had to go down to the station and capture one shot we need of a train pulling in at the station. We have to take in account the weather forecast before as we are due heavy storms and this would not fit in with the rest of our shots as they had sunshine. If we are unable to get the shot then we can get the shot in January when we come back to college after the Christmas holidays. Currently these are the three shots that join together - we feel as though a shot linking the train moving and it being completely stopped together (like a shot of the train coming to a hault).
 (Above) This is a picture of us getting a really nice shot of a train pulling into the staion like we wanted. However we had some problems with the continuity because although we could look up when a train was due to arrive, there was no telling what kind of train it was going to be - and it had to be the same type of train to the one the male character was on, this meant that we had to aniticipate the train we wanted and just film and wait to see if it would work.

(Right) This picture shows another problem we encounted with continiuty. We really liked this shot of a train pulling away so we came up with the idea to reverse the clip which looked really good. However after watching it a few times we realised that there were people in the background (circled in red) who were walking backwards, forming our continuity problem. So our solution to this (shown right) was to still use the clip but to start it after the people where no longer in the frame.
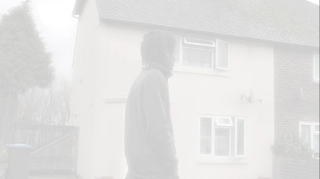
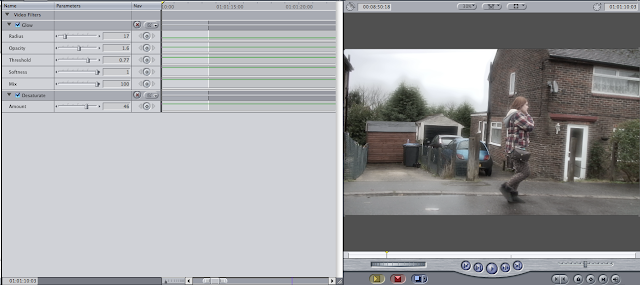
 Another thing we had think about whilst editing that had not occured to us before this stage, was how we were going to really get the idea that the flashbacks were indeed flashbacks and seperate from the rest of the footage. Orginally we had planned to use cross cutting, however because we are using cross cutting already in our film in parts that werent flashbacks we needed even more differentiation. So firstly we interchanged between the flashbacks and the real world with a fade to white which we felt blended them together (shown left). Secondly, we came up with the idea of destaturating the flashback or making it brighter to exgagerate the difference between the flashbacks and the real world as well as adding a glow to give it that dreamlike feel. Below is an example of our experiment. We ended up liking the desaturate more.
 We used a range of continuity editing practices whilst editing:
SHOT REVERSE SHOT
This shot's function in films is to show a character looking at another character that is off screen so the audience can see the character's facial expression and composition more closely. Then in Shot reverse shot we see the other character looking back who was previously off screen. As the characters are placed in the 180 degree rule, the audience can tell the characters are looking at each other as this rule is in place.The function of the shot reverse shot in our film was to show the characters POV and what they are seeing to give another dimension to the audience of these characters and to allow us to see what they are seeing on screen. We can also tell from their facial expressions who they are feeling and this demonstrated on screen and comes across to our audience as we have a close up shot of their faces to show their facial expressions clearly to the audience.
The function of a dissolve shot is very similar to a fade shot and how they look. However, the difference between them is that a fade changes into a color. We used a dissolve shot as a dissolve passes into another shot and changes the visibility until the transition is completed and the shot has changed entirely. It can be used to show a from one from the other until eventually the shot has link between a objects or people or to show the passing of time. We used this shot to show the passing of time in our film. We wanted to emphasis with this dissolve that she has been talking on the phone over a long period of time. We used the dissolve as we felt it look good and send the communicated the message that she had been on the phone a long time rather than using the option of text on a black screen after it had faded into it saying 5 minutes later " over and over again on the screen as this wouldn't look good and wouldn't keep the pace of our film going.
EYELINE MATCH
The function of the eye line match is to help continuity flow in films and is part of the continuity editing system. An eye line match allows the audience to see what the character on screen is looking at and are then able to see it from their point of view allowing the audience to connect more with the character we see on screen and establish more of a relationship with them. In this case, the use of eye line match in the scene allows us to see the character look over at what is annoying him and from the eye line match, we see the crisps and the female is the thing that is causing his annoyance in the scene and the audience can understand this from the shot we have used.
DISCONTINUITY ZOOM
But then there was also some problems we encountered that we know would make our film have discontinuity. Like one of the Close up shots of the female character leads into another shot of her supposedly in the same position, however the background changes. So to try and mask the issue we compromised slightly on quality and zoomed the shot in, in order for the background to not be noticable. In this example of when we did this (below) we changed the close up into an extreme closeup.


Yes, I think this is an effective tool to use, an either way will work (see the opening of the British film Wakewood, where over exposure - prob post production - has been used.
ReplyDeleteGood material that you've added here, but to make it better, explain the function of techniques you've used more consistently - eg shot reverse shot.
ReplyDelete